How do I apply to live in upperclass on-Grounds housing?
The Undergraduate Housing portal is where you’ll complete your housing application, create or join roommate groups, and eventually select your housing for next year.
If you have questions about how to navigate the housing portal, let us walk you through the process with these instructions.
If you have any questions as you complete the process, you can always email us, or call 434.924.3736 between 8:00 a.m. and 5:00 p.m., Monday through Friday.
Starting the Housing Application
Login and Initial Steps
When you click the link to the housing portal, you’ll first be prompted to log into NetBadge.
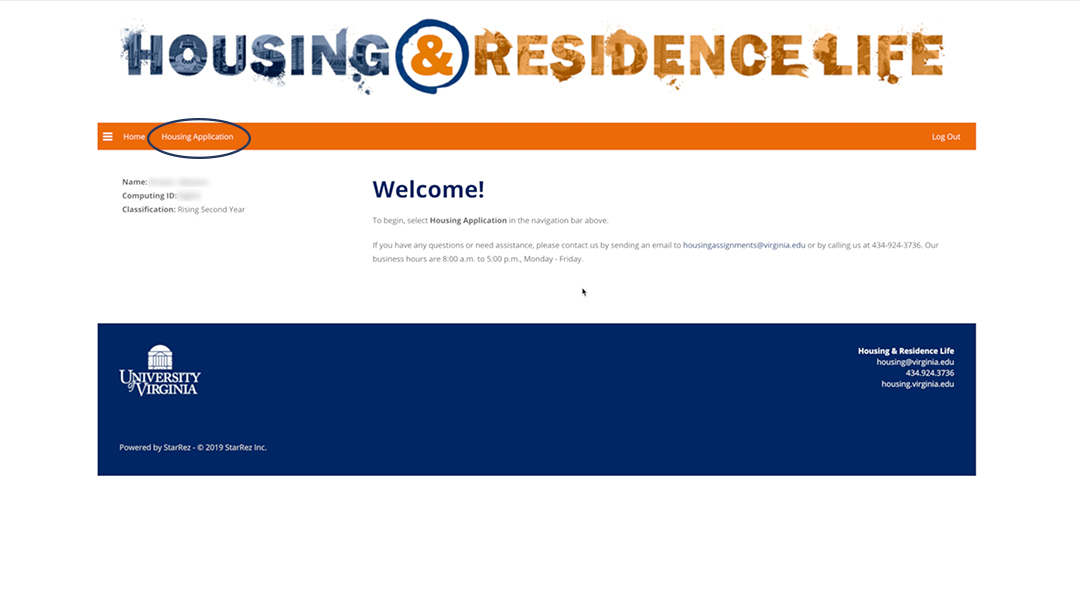
Once you are logged in, you’ll see a Welcome page with your name, computing ID, and class year. To begin the process, click the Housing Application link on the orange navigation bar near the top of the page.
On the Select Application page, you want to choose the application for Academic Year 2025-2026.

On the Welcome page that follows, you’ll see the steps at the top that you’ll need to complete during this process. If you’re ready to begin, click the blue Save & Continue button at the bottom left.

Personal Details
On this page, you’ll see your personal information as obtained from SIS. If any of this information is incorrect, please let us know by clicking either of the text links above or below your information to send us an email.
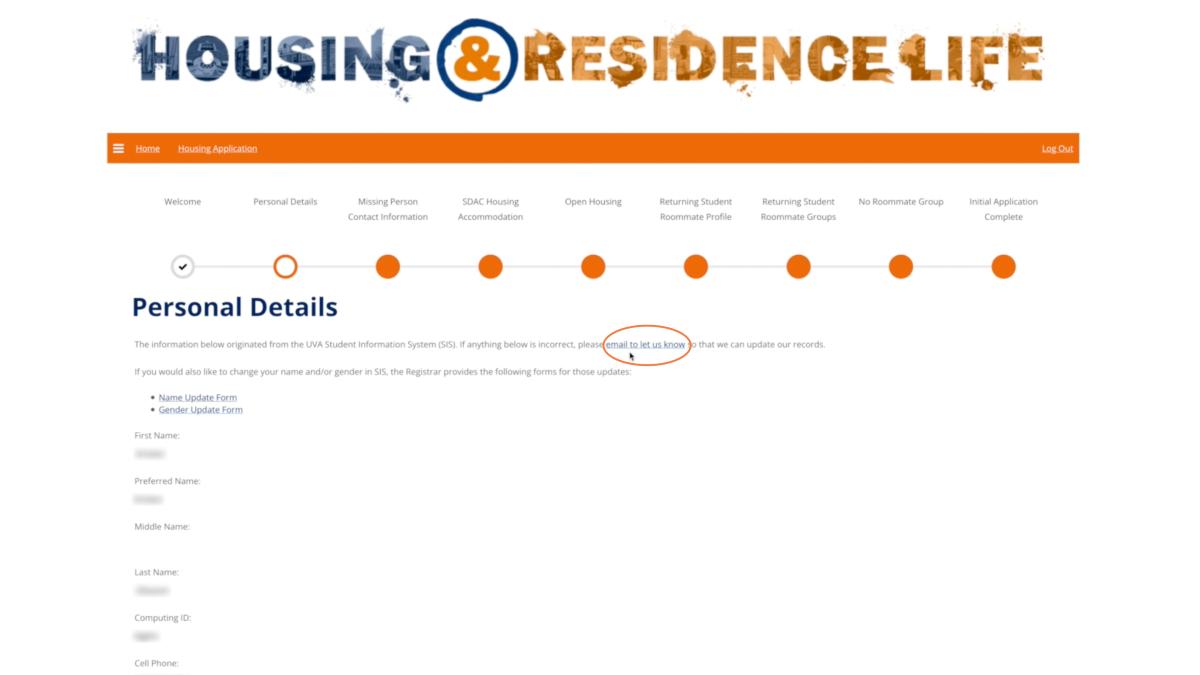
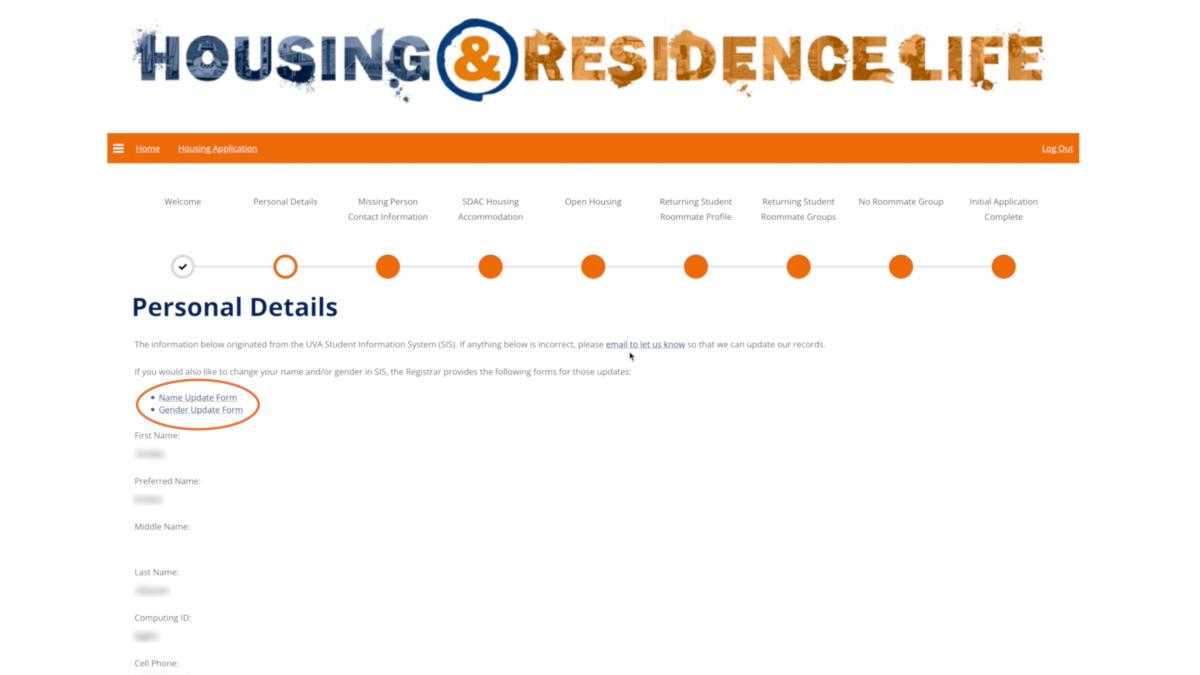
Also see the links to the Registrar forms to change your information in SIS.
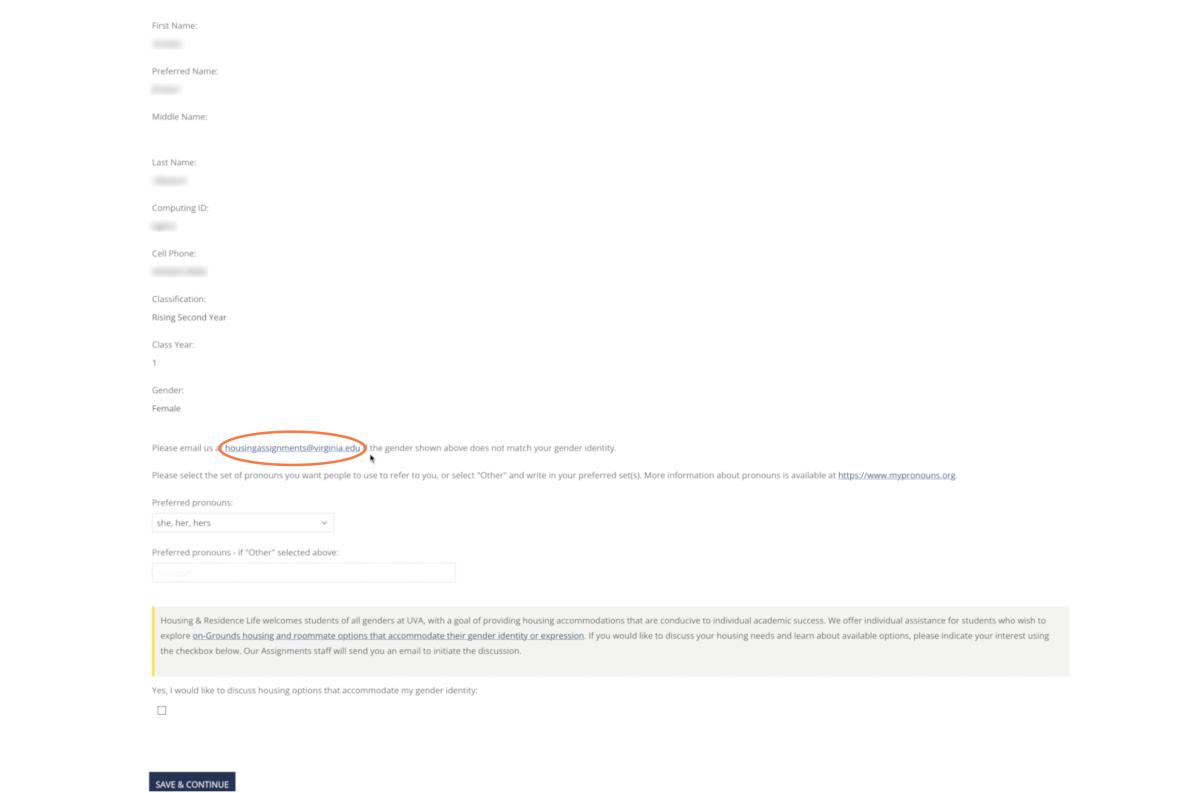
You can also select your preferred pronouns on this page, and have the option to check the box at the bottom to explore on-Grounds housing options that accommodate your gender identity or expression.
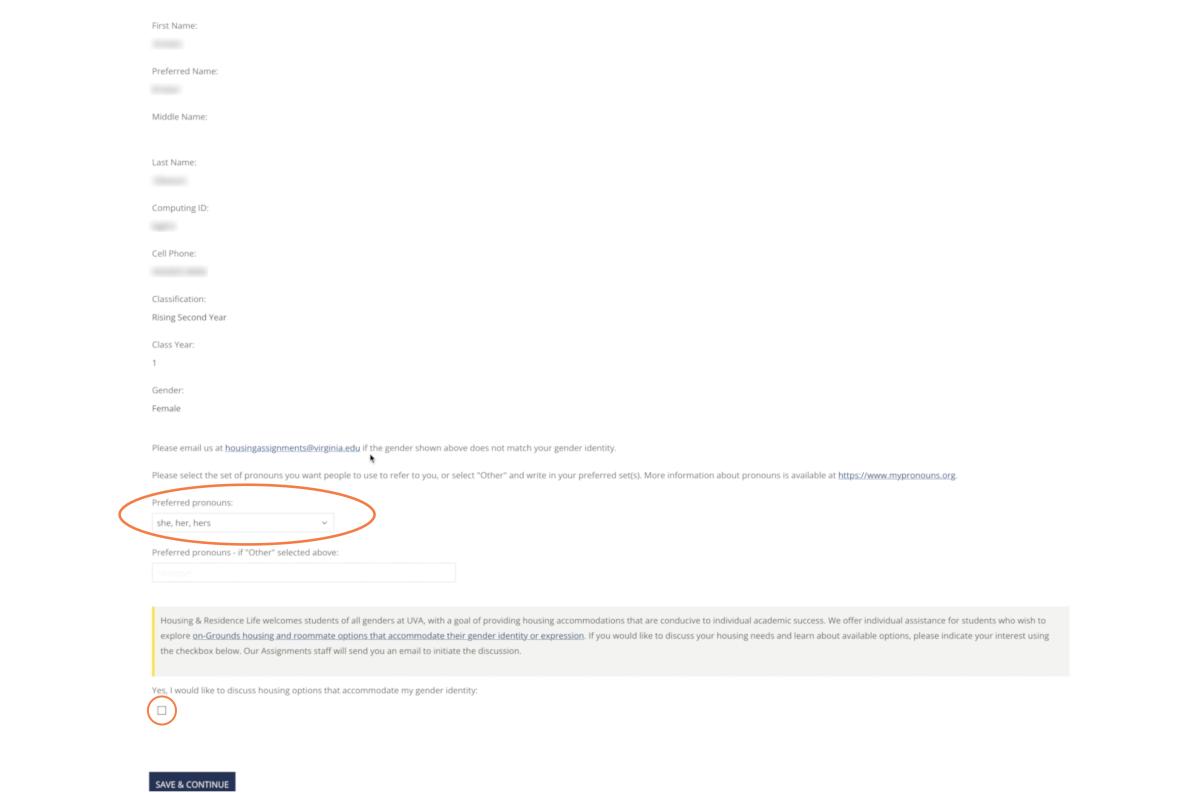
When you’re ready, click the blue Save & Continue button at the bottom left.
Missing Person Contact Information
On this page, you can enter information for an individual to be contacted by the University if you are determined to be missing. This is often a parent or a friend. Entering information is optional, and you are not required to provide a missing person contact.
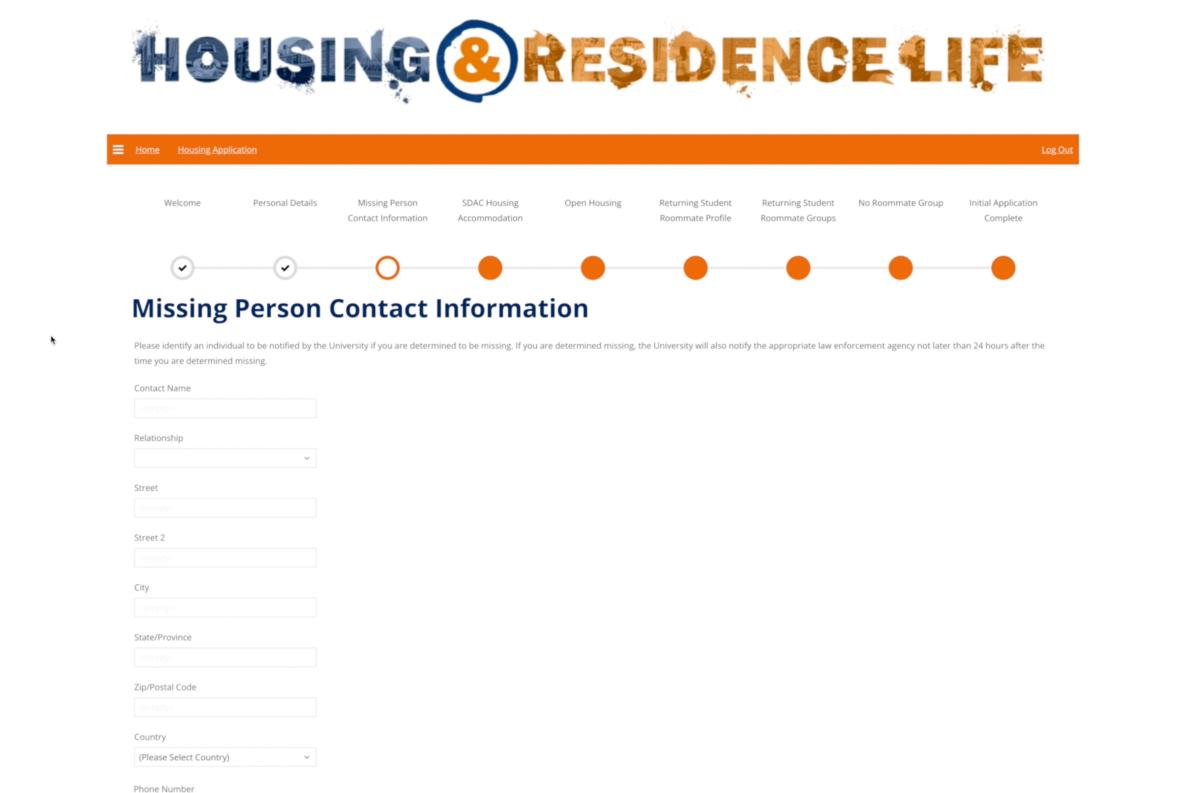
When you’re ready, click the blue Save & Continue button at the bottom left.
SDAC Housing Accommodation
This page allows you to tell us if you require special housing accommodations based on disability-related needs. Some examples of special housing accommodations include wheelchair accessibility, elevator access, a single room, or a service animal or emotional support animal.
If you select Yes, you will need to complete and return the appropriate forms to the Student Disability Access Center (SDAC) before your housing application deadline -- see the additional information near the bottom of the page.
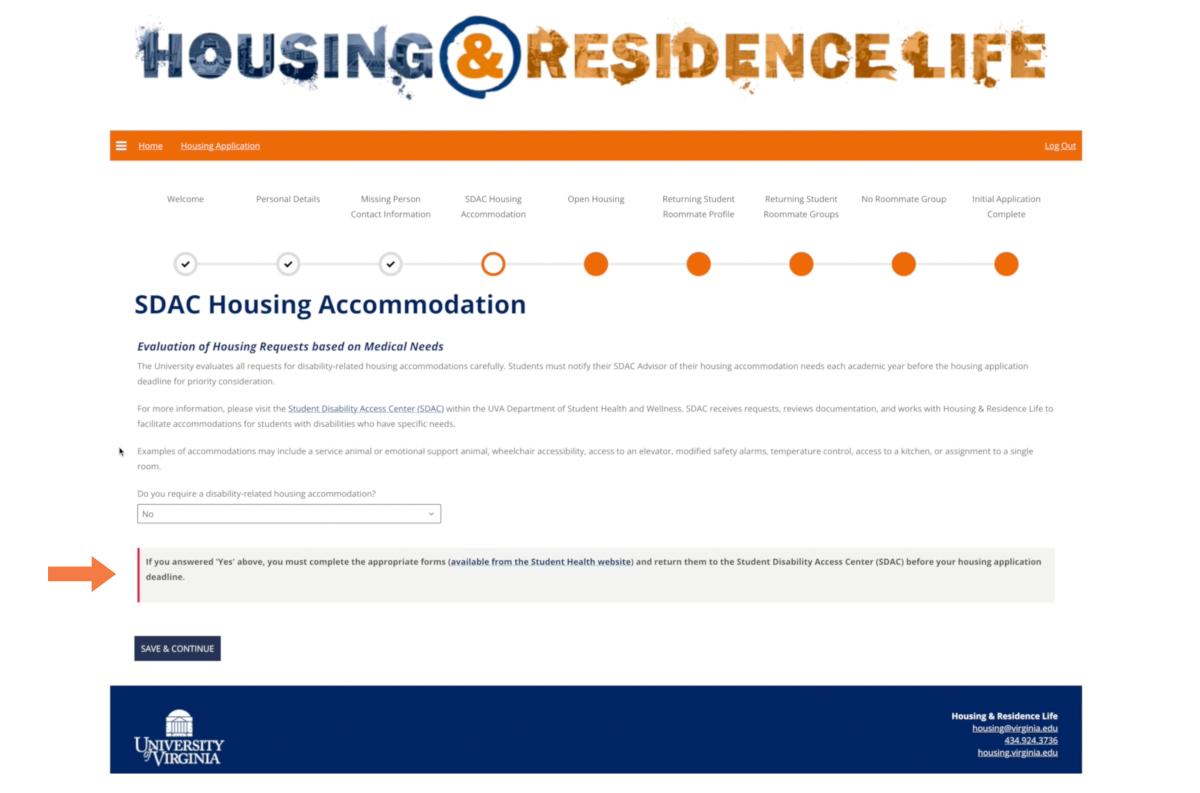
When you’re ready, click the blue Save & Continue button at the bottom left.
Creating a Roommate Profile and Group
Students applying for on-Grounds housing can create or join a roommate group, or apply for housing on their own.
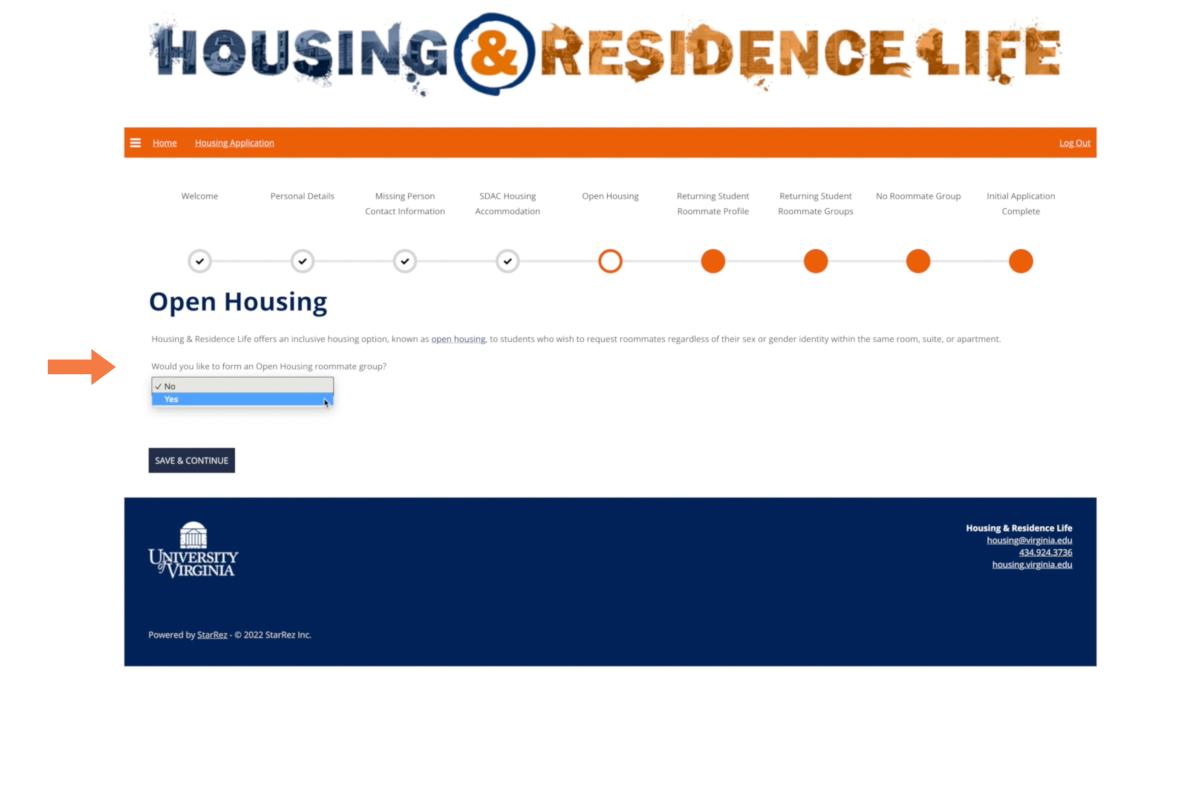
Open Housing
While all members of a roommate group are the same gender by default, UVA offers a co-ed housing option known as Open Housing.
Select the dropdown window in the middle of the page to indicate you would like to form an Open Housing group with roommates of a different gender, then click Save & Continue.
If you opted for Open Housing, you will see the Open Housing Guidelines page. Be sure to read the guidelines carefully before agreeing to them, and then click Save & Continue.

If you do not wish to proceed, click the Open Housing step in the timeline to go back and change your Open Housing selection.
Returning Student Roommate Profile
This page lets you add information about yourself to share with potential roommates. If you want to allow potential roommates to add you to a roommate group, select Yes in the dropdown window. You may also complete the optional profile questions at the bottom of the page, to help you search for a potential roommate who provided similar answers to the questions.
The information you enter on this page does not affect your ability to create or join a roommate group.
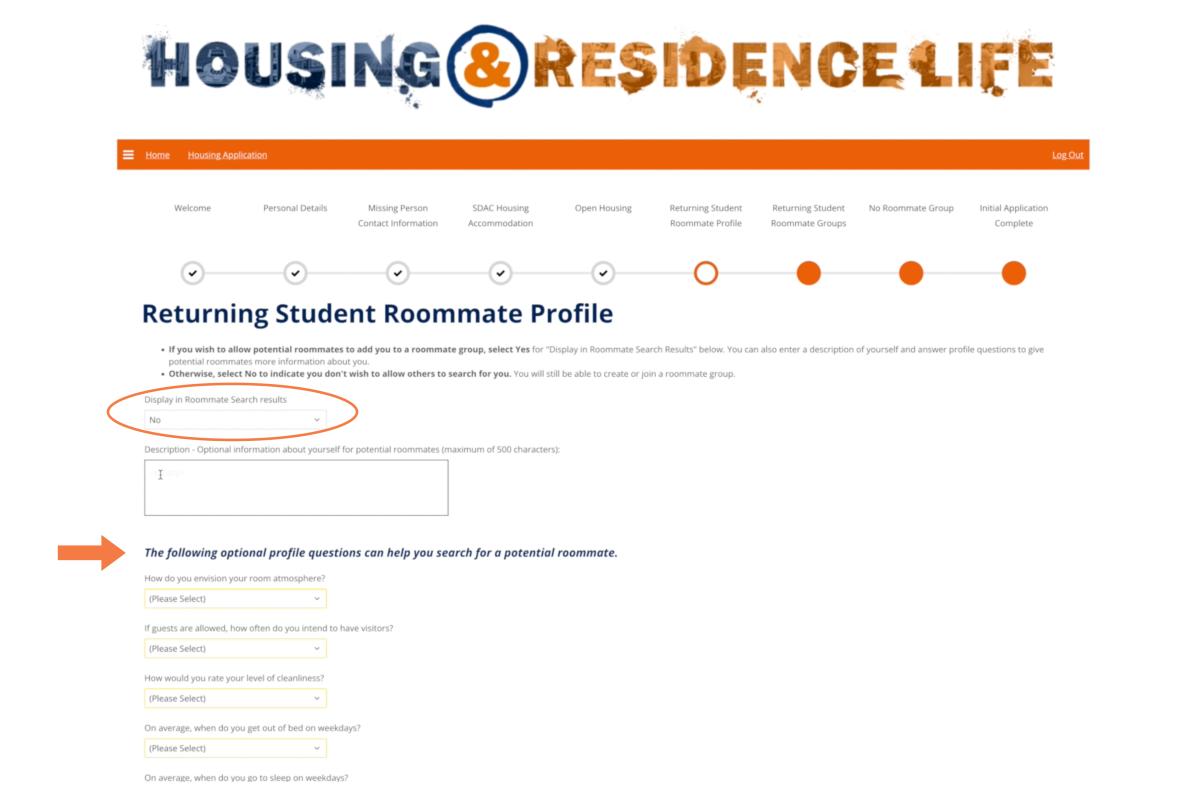
When you’re ready, click the blue Save & Continue button at the bottom left.
Returning Student Roommate Groups
On this page, you can create a roommate group or add yourself to an existing group.
Creating or joining a roommate group is optional, and you may apply for housing on your own (see "Applying for Housing on Your Own," below).
Until you create or join a group, you’ll see a message in the middle of the screen that says “Not In a Group.”

Creating a Roommate Group with Other Students
How to Create a Roommate Group
To create a roommate group including other students, click the gray Create Group button at the lower left.

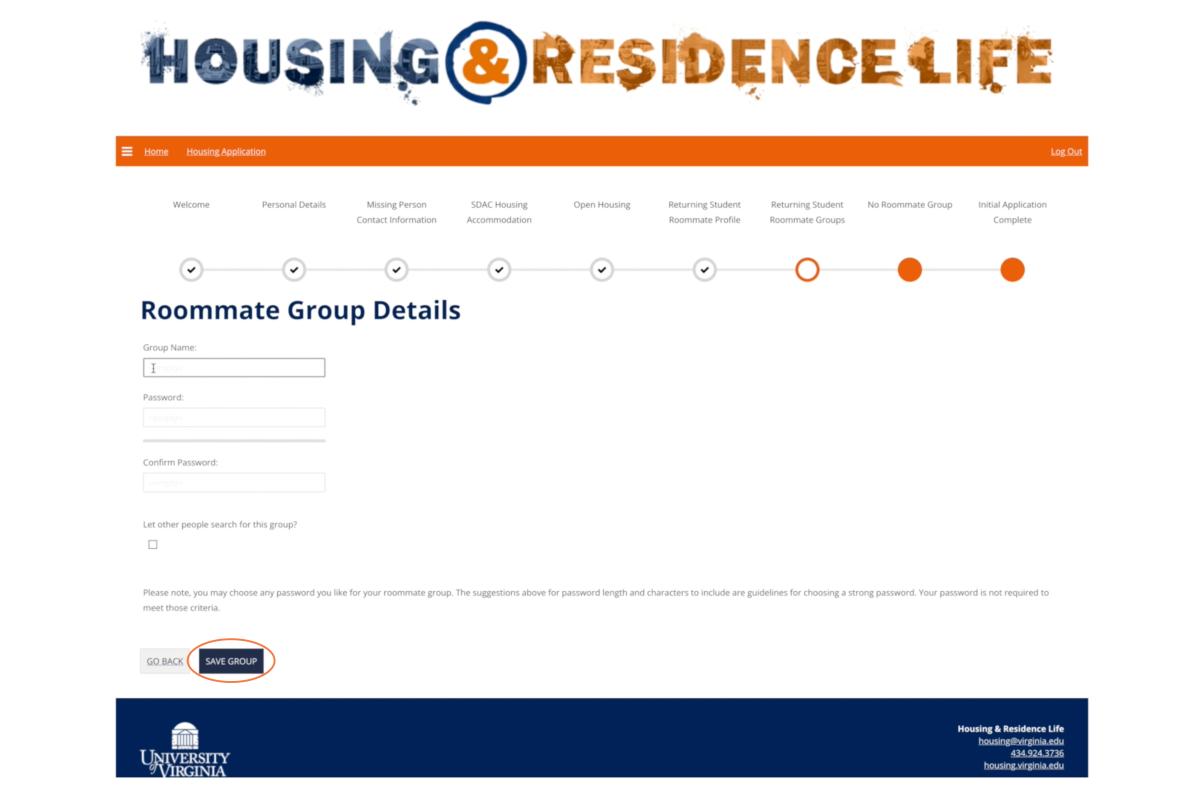
You’ll be taken to a page to select a group name and password. You can allow other students to search for this group by checking the box below that option.
When you’ve entered the group details, click the blue Save Group button to continue. You’ll receive an email letting you know your roommate group has been created.
Adding Roommates to Your Group
You can share your group name and password with your roommates, or add them to your group yourself by clicking the Search for Roommates by Details text link on the bottom right.

Enter the student’s computing ID on the roommate search page, and click the blue Search button on the lower left. When you find the student you're looking for, click the blue Add to Group button at the lower left.
Repeat this process for each roommate you want to add to your group.
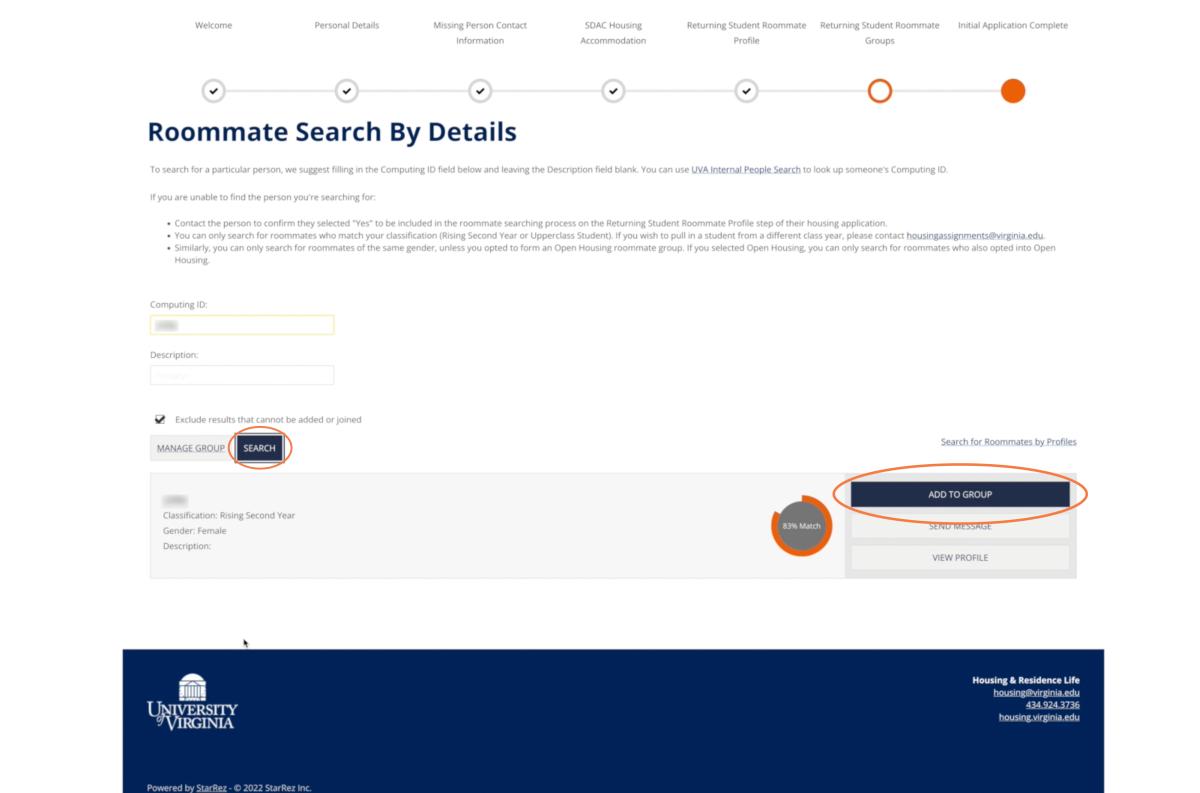
See the troubleshooting tips in the middle of the page if you can’t find the person you’re looking for.
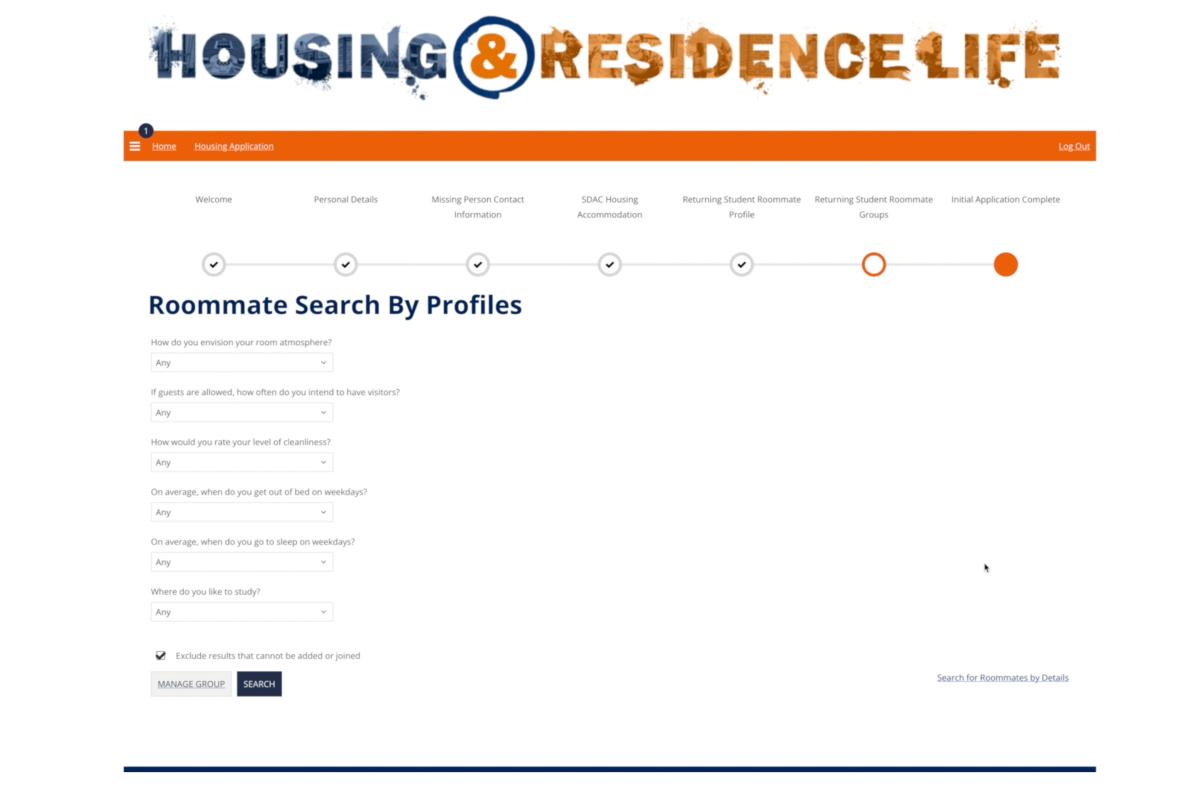
Search for Roommates by Profiles
You can also use the Search for Roommates by Profiles text link on the bottom right to find roommates to add to your group.

On the Roommate Search by Profiles page, you can filter potential roommate results by any of the profile question answers.
Once you identify a potential roommate, you should send them a message so you can get to know them before asking them to join your group.
Joining a Roommate Group
How to Join a Group
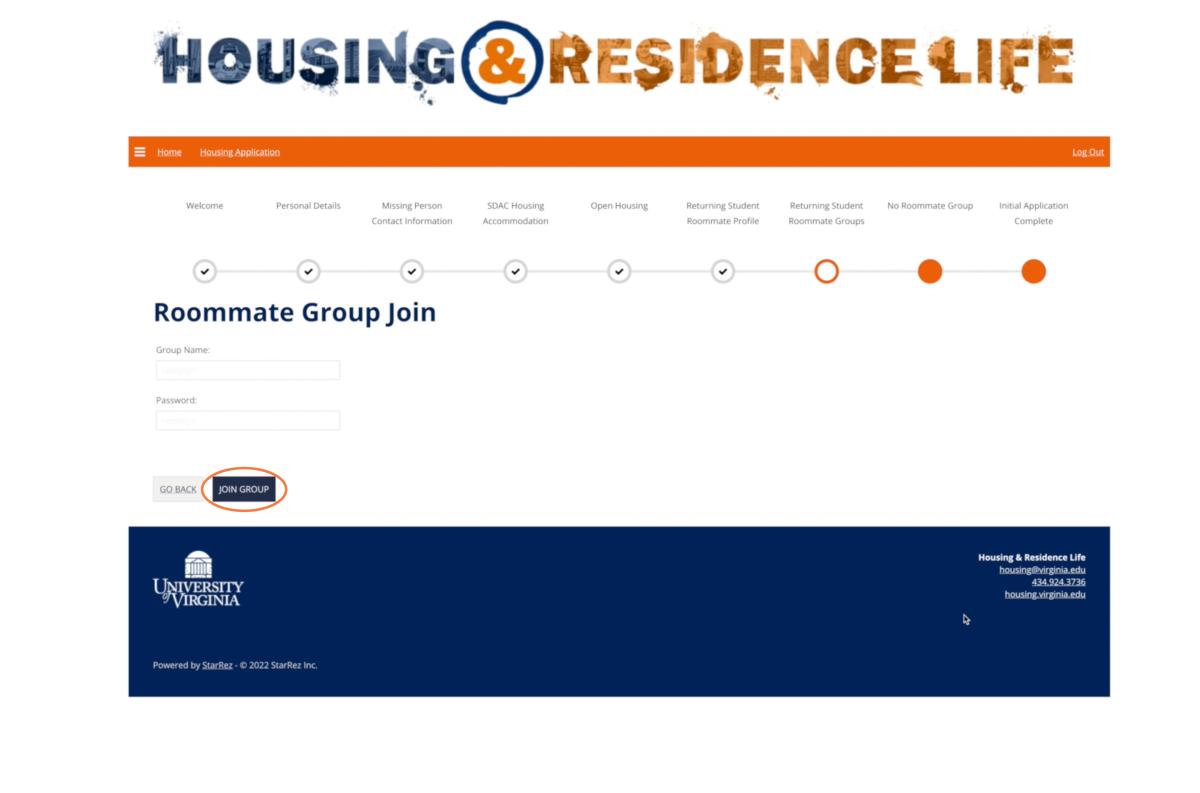
If instead of creating a group, you want to add yourself to a roommate group created by another student, click the Join Group text link on the bottom right.

You’ll need to know the name and password for that group in order to join it. After entering this information, you can click the blue Join Group button to continue.
Once you’ve added yourself to an existing roommate group, click the blue Save & Continue button at the bottom left.
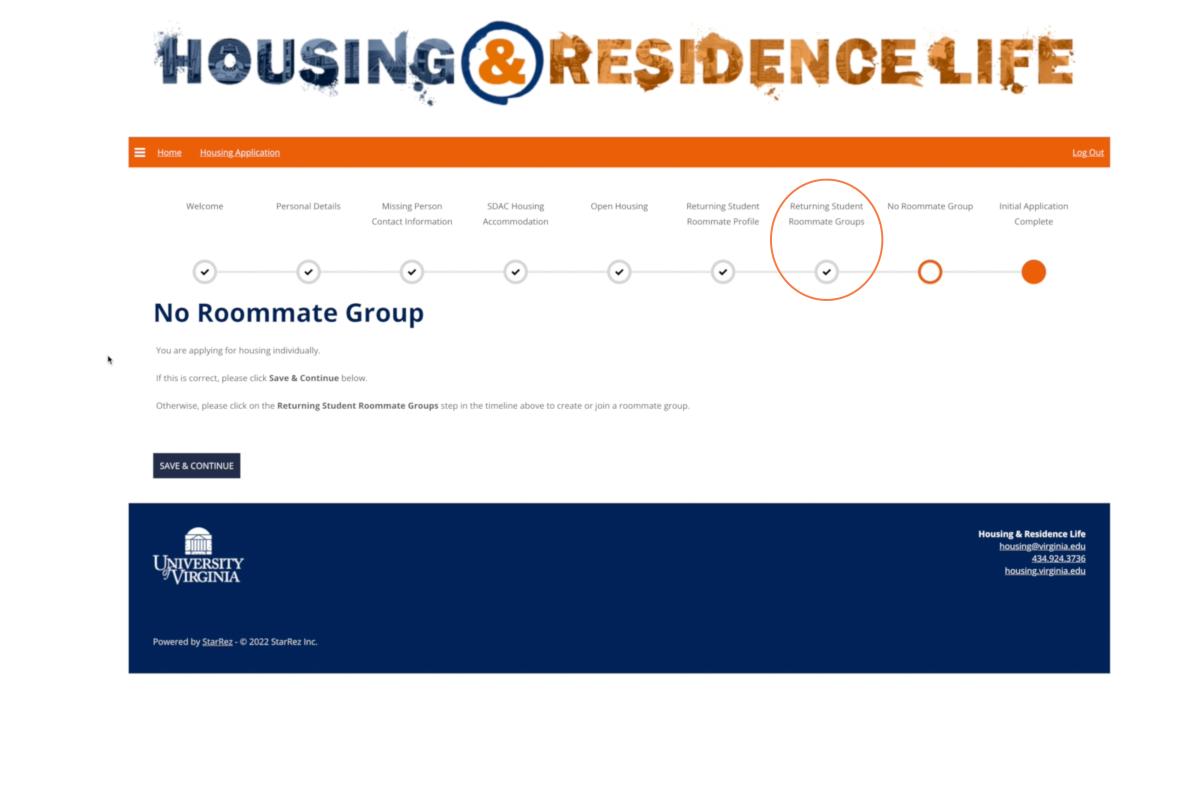
No Roommate Group Page
If you click through the Returning Student Roommates page without joining a roommate group, you will see the No Roommate Group page.
If you want to create or join a roommate group, click the Returning Student Roommate Groups step in the timeline to go back and create or join a group.
Applying for Housing on Your Own
How to Apply on Your Own
If you are applying for housing on your own, you do not need to create a roommate group in the Returning Student Roommate Groups step.
Instead, click the blue Save & Continue button at the bottom left to go to the next step.

Confirm You're Applying on Your Own
On the No Roommate Group page, simply click the Save & Continue button at the bottom left to confirm that you are applying for housing on your own.

Initial Application Complete
Application Confirmation
The Initial Application Complete page confirms that we’ve received your application.

You’ll receive an email after the application deadline with room selection information.
Room Selection
All students who created or joined a roommate group, or confirmed they are applying individually, receive an email with room selection timeslot information.
You'll want to communicate with your group members to see which person was assigned the earliest selection date and time.
If you need to make changes to your roommate group, you can do that youself! See Making Changes to Your Roommate Group, below.
Continuing the Housing Application
As you log in to the housing portal, and click “Housing Application” in the orange menu bar, you’ll see an option to continue your application for the current academic year.

If you log into the housing portal before your assigned time slot, you will see a message that says “Room Selection Not in Timeslot.”

Once you are logged in, you’ll see the housing application steps that you’ve already completed near the top of the screen. During your timeslot, you will automatically start at the Room Selection step.
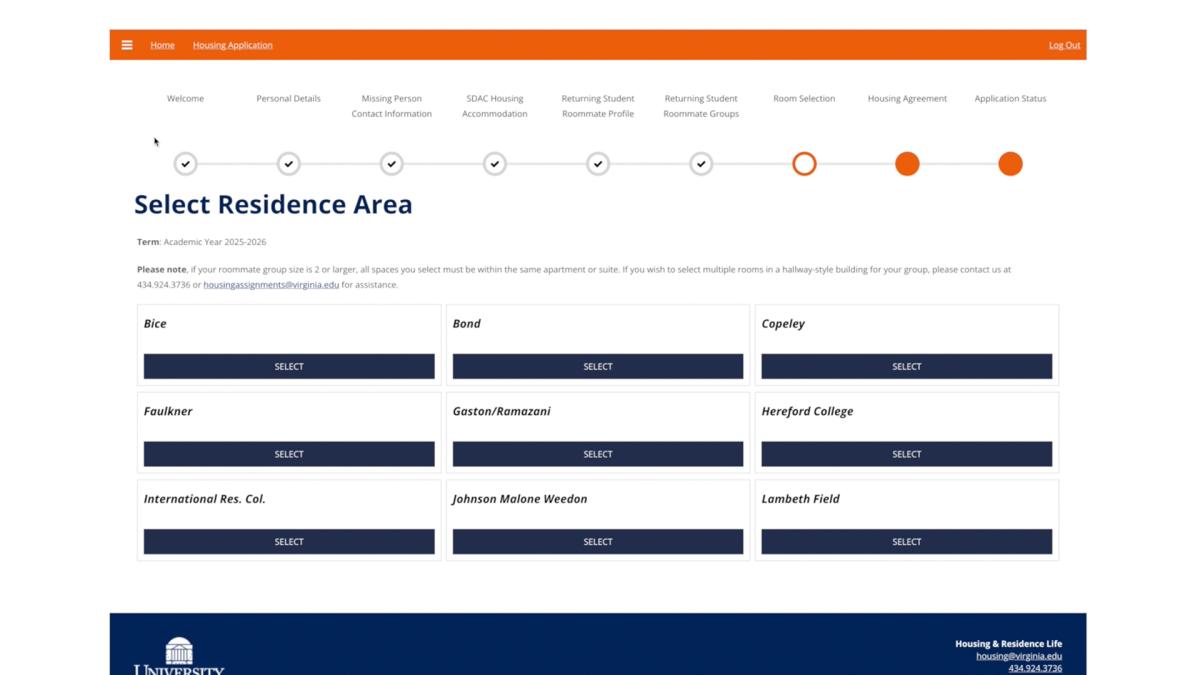
Browsing On-Grounds Housing Areas
On the Select Residence Area page, all available housing areas are shown. You may click any of the “Select” buttons to see the available rooms in that housing area.
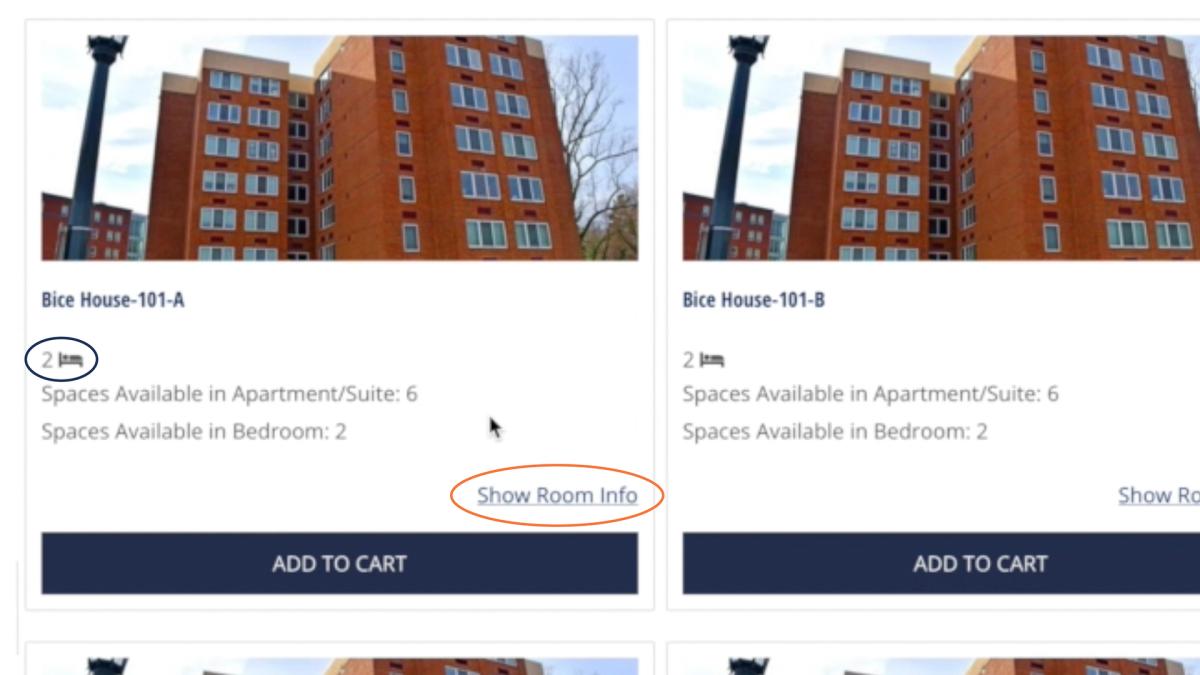
After selecting a housing area, you will see the Room List page, with all of the available rooms that match your selection. Nine rooms will display at a time, and additional pages of rooms are shown at the bottom right.

Below the building and apartment or suite number for each room, you will see a bed icon with a number, indicating the capacity for that bedroom.
The number of available spaces in the apartment or suite, and number of available spaces in that bedroom will be shown.
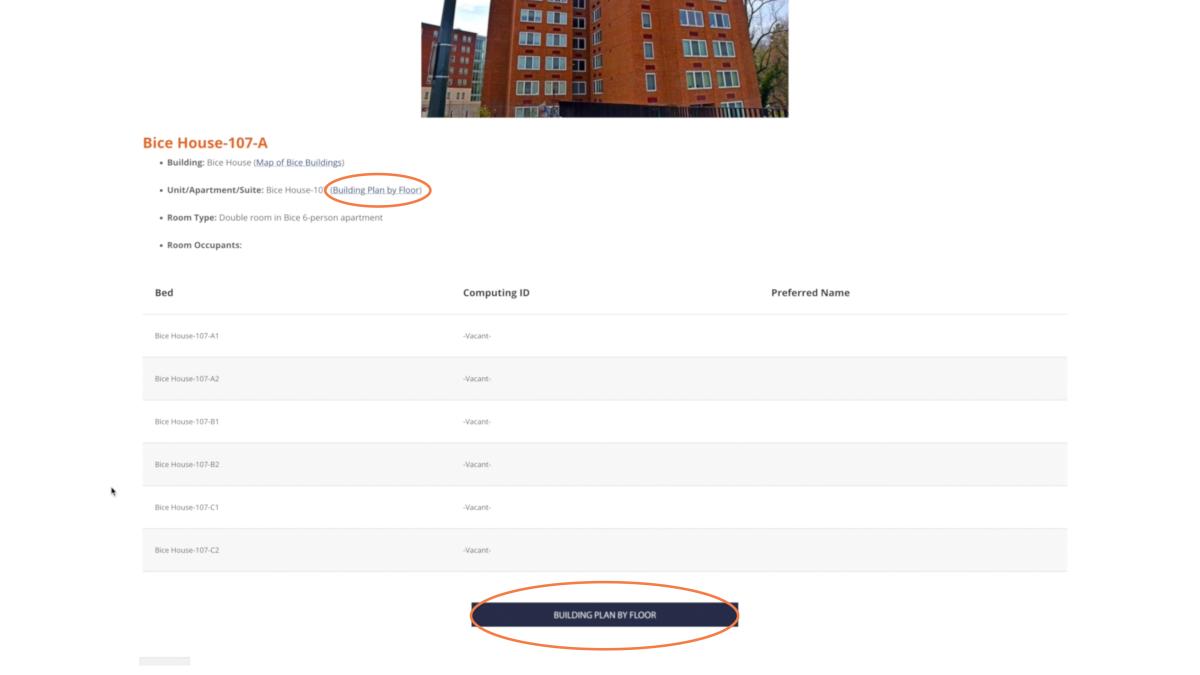
To see who has already reserved space in that apartment or room, click the “Show Room Info” link at the bottom right of each available room.
The Room Info page allows you to click through to see floor-level building plans for each available room.
Filters on the left side of the Room List page allow you to only view certain room types. Available filters include:
- housing area and building
- unit, apartment, or suite number
- double or single rooms
- apartment capacity

Making Changes to Your Roommate Group
If there are no apartments with enough vacant spaces for your group, you can split the roommate group yourself. You'll need to return to the Returning Student Roommate Groups step by clicking on it near the top of the page.

Please note that only the group leader -- the student who created your group -- can make changes on behalf of other students. Group leaders can:
- remove roommates using the "Remove Roommate" button beside each student
- make another student the group leader using the "Make Leader" button beside that student
- delete the group entirely using the "Delete Group" button under the group name

Students who are not group leaders may also leave their current roommate group by clicking the "Leave this Group" button under the group name. Students who leave or are released from a group are free to crreate or join a new roommate group, or select a room on their own.

Selecting Rooms
When you decide on the housing that is best for your group, click the “Add to Cart” button, selecting enough rooms to accommodate all members of your group. The button below each selected room will change to a gray “Remove from Cart” button, and you can deselect the room if you change your mind.

As soon as you place a room in your cart, a five-minute countdown clock will appear at the top of the page. If you do not complete the room assignment process within this time, your cart will be emptied. You’ll receive a warning before this takes place.

When you’ve added enough rooms for all members of your group, click “Save & Continue.”
As noted near the top of the page, if you are selecting rooms for a roommate group, all the spaces you choose must be within the same apartment or suite. If you wish to select multiple rooms in a hallway-style building for your group, please contact us for assistance.

On the Assign Beds page, choose which bed you would like to assign to each member of your group. After assigning all members of your group, click the blue “Assign Beds” button to continue.

If everything looks right on the Confirmation page, click “Save & Continue” to hold your selected rooms.

Accepting the Housing Agreement
On the Housing Agreement page, you will see what you’ve selected, and you can review the Undergraduate Terms & Conditions of Housing.

In the gray box below the PDF, you will see a cancellation date listed. If you accept the housing agreement, you can still cancel the agreement and be released from the contract by following the instructions listed here on or before the cancellation date.

If you are sure you want to agree to the assignment, enter your UVA computing ID in the field below the gray box, then click “Save & Continue.”
If you are unsure, you can stop before entering your computing ID. You can leave the application and come back at any point before the end of your room selection timeslot.
After you click “Save & Continue,” you’ll see the Application Status page, showing your assignment details and cancellation date. You’ll also be sent an email to confirm that your housing agreement has been received.

Any other members of your roommate group will each need to individually sign the housing agreement in order to lock in their own spaces.